En voulant tester plusieurs distributions avec le raspberry j'ai souvent été confronté au même problème.
En pluggant ma carte sd pour la formater sous Windows la partition détectée est inférieur à la taille de la carte.
Avant je n'avais trouvé comme solution que de booter sous une distro linux pour utiliser GParted.
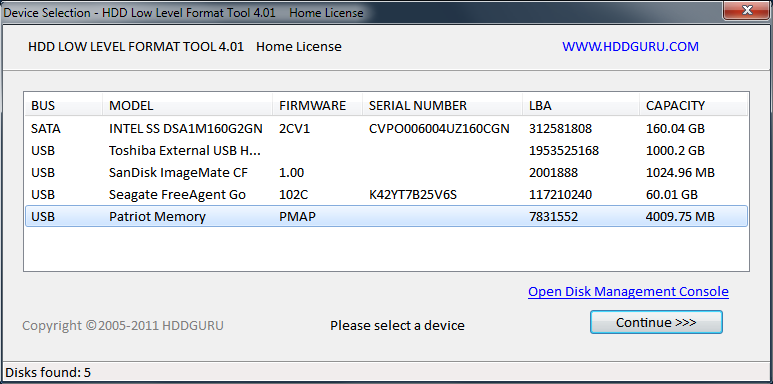
Voici la solution sous Windows : HDD LLF Low Level Format Tool
Ce software permet de réaliser facilement une interface graphique en faisant du drag and drop d’élément.
La code derrière est entièrement en Powershell. La force de ce logiciel c'est qu'une fois le code testé on peut exporter en .exe.
Ce programme devient alors exécutable avec comme seul prérequis d'avoir Powershell d'installé.
Voici à quoi ressemble l'interface :
Et la démo en vidéo :
Au niveau des branchement,
- le servo est branché sur l'entée 2.
- Une LED s'allume lorsque le servo tourne, elle est branché sur la pin 8
Voici pour le code de l'Arduino :
#include
Servo monServo;
int led = 8;

void setup() {
  pinMode(led, OUTPUT); // Set pin 13 as digital out
  // Start up serial connection
  Serial.begin(9600); // baud rate
  Serial.flush();

  gostop();
}
void gostop()
{
  monServo.detach();
}

void loop() {
  // put your main code here, to run repeatedly:
  String input = "";

    // Read any serial input
    while (Serial.available() > 0)
    {
        input += (char) Serial.read(); // Read in one char at a time
        delay(5); // Delay for 5 ms so the next char has time to be received
    }

    if (input == "left")
    {
        digitalWrite(led, HIGH); // on
        Serial.println("on");
        monServo.attach(2);
        monServo.write(180);
        delay(50);
        gostop();
        digitalWrite(led, LOW); // off
    }
    else if (input == "right")
    {
        digitalWrite(led, HIGH); // on
        Serial.println("on");
        monServo.attach(2);
        monServo.write(-180);
        delay(50);
        gostop();
        digitalWrite(led, LOW); // off
    }
      else if (input == "fullright")
    {
        digitalWrite(led, HIGH); // on
        Serial.println("on");
        monServo.attach(2);
        monServo.write(-180);
        digitalWrite(led, LOW); // off
    }
      else if (input == "fullleft")
    {
        digitalWrite(led, HIGH); // on
        Serial.println("on");
        monServo.attach(2);
        monServo.write(180);
        digitalWrite(led, LOW); // off
    }
      else if (input == "stop")
    {
        digitalWrite(led, HIGH); // on
        gostop();
        digitalWrite(led, LOW); // off
    }
}
Et voici la partie de Powershell Studio :
function OnApplicationLoad {
 return $true #return true for success or false for failure
}


function OnApplicationExit {
 $script:ExitCode = 0 #Set the exit code for the Packager
}

$form1_Load={
 #TODO: Initialize Form Controls here
 $port= new-Object System.IO.Ports.SerialPort COM3,9600,None,8,one
}

$buttonLEFT_Click={
 #TODO: Place custom script here

 $port.open()
 $port.Write("left")
 $port.close()
}

$buttonRIGHT_Click={
 #TODO: Place custom script here
 $port.open()
 $port.Write("right")
 $port.close()
}

$buttonFULLLEFT_Click={
 #TODO: Place custom script here
 $port.open()
 $port.Write("fullright")
 $port.close()
}

$buttonSTOP_Click={
 #TODO: Place custom script here
 $port.open()
 $port.Write("stop")
 $port.close()
}

$buttonFULLRIGHT_Click={
 #TODO: Place custom script here
 $port.open()
 $port.Write("fullright")
 $port.close()
}